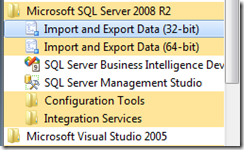
Before we start importing data into SQL Server, let’s create a database first. We are going to name itDemo.
- Start SQL Server Management Studio under Microsoft SQL Server 2008 R2.
- Enter .\SqlExpress in Server name: and click Connect button.
- Microsoft SQL Server Management Studio is now launched
- Right Click on Databases and Select New Database…
- New Database dialogue is displayed.
- Enter Demo in Database name:
- Change the Initial Size (MB) to 50 and 5 for Demo and Demo_log respectively.
- Click OK button.
- Demo database is ready to use.
Import Excel Into SQL Server
We are going to use the Import and Export Wizard from SQL Server; it is a very powerful tool that we can use it to import and export a wide range of data files. We are going to use it to import Excel.
- Start Import and Export Data (32-bit) under Microsoft SQL Server 2008 R2
- SQL Server Import and Export Wizard is launched, click Next button
- Select Microsoft Excel as Data source
- Enter the location of Excel file in Excel file path:
- Click Next button.
- Choose SQL Server Native Client 10.0 as Destination
- Enter M1330\SQLExpress in Server name.
- Select Demo as Database
- Click Next button.
- Select Copy data from one or more tables or views
- Click Next button.
- Select ‘Sheet 1$’
- Click Edit Mappings…
- Import and Export Wizard would automatically create the table structure for us but we can modify it.
- Click OK button to return to Wizard.
- Click Next button.
- Import and Export Wizard now created a package for us, and we can run it immediately.
- Click Next button.
- Click Finish button.
- Click Close button to close the status dialogue.
- Let’s go back to Microsoft SQL Server Management Studio
- We noticed that there was a new table “dbo.Sheet1$.
- Let’s rename it to ContosoStore
- Table name is changed to ContosoStore.
- Let’s look at the content of the table.
- A SQL statement is generated for us and we can see the result dataset.


No comments:
Post a Comment